The several benefits of practicing Yoga cannot be denied or ignored. With its origins deep-rooted in India, it is an activity that not just engages your body but also your mind & soul. Making it a habit will benefit you in the short as well as the long run. If you’ve been experiencing a constant ache in your back that you’ve tried to alleviate by incorporating several measures but to avail, then we might have the most trusted solution for you. Yoga for back pain is highly recommended by doctors and physicians as its results are commendable.
It has been known to instantly make you feel better, by means of working numerous muscles and relieving stress too. In this article, we’ve rounded up yoga asanas for back pain.
Importance of Back Pain Yoga Poses
The pandemic has surely led to poor postures and a more sedentary approach to living, but it’s not the only contributing factor. 9 to 5 jobs play a huge role in the stiff backs we’re all experiencing today, whether it’s a 20 year old or a 50. Amid our laziness to move and the demands of our jobs, we’ve forgotten that we’re only making our bodies age faster. Yoga ensures your muscles and your mind both stay young, and your health problems are gone for good.
Yoga for back pain is a go-to solution for everyone who realizes its benefits and decides to skip the pain-relief medicines after understanding their side effects. In a world where our mind and body both aren’t at ease, yoga comes in as a savior with a promise to make it all better for us. So if the question is “Can yoga relieve back pain?”, all you need is a few minutes out of your day to practice the asanas we’re listing below.
Things To Keep In Mind
Just like any other workout regime, yoga too has to be practiced with caution.
- Warm-up before you begin. Do a few general stretches for at least 5-10 minutes
- Don’t continue any pose if it brings in pain or discomfort! Listen to your body.
- New to yoga? Head to a studio nearby for some expert guidance or take up a guided course online.
- Remember – only intermediate-level yoga practitioners can do fast yoga. As a beginner, you need to take it very slow and set a relaxed pace rather than a powerful one.
- Breathe in and breathe out in regular intervals.
- Focus on practicing yoga asanas for back pain for 15 to 20 minutes every day, preferably in the morning.
Which yoga exercise is best for back pain?
Trust these asanas to slowly make your back pain disappear! Bear in mind that along with these, you also need to practice good posture throughout the day and be mindful of your lifestyle choices. No asana alone will make a difference; it’s a collective of the decisions you make and staying dedicated to a routine to ensure the amazing health benefits of yoga! Let’s take a look at some common poses for this extremely widespread ailment.
The Cat-Cow Pose
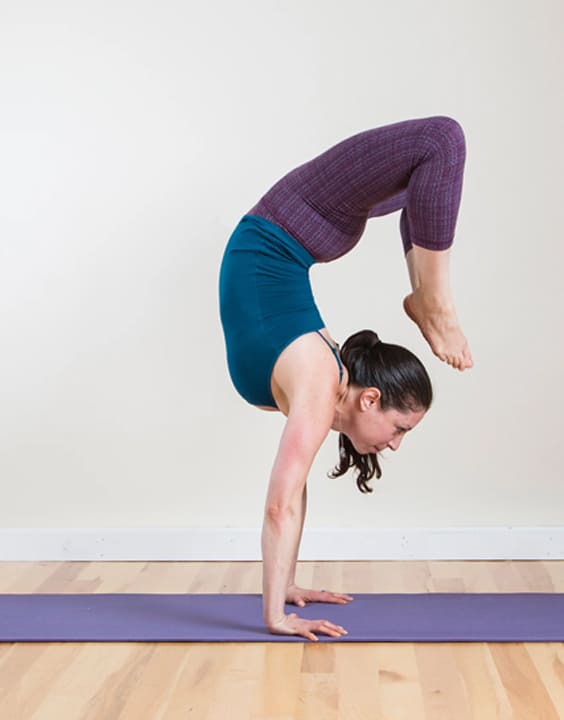
Also known as Marjaryasana/Bitilasana, the cat cow pose employs two types of stretches that are bound to help your spine in a significant way. This yoga for back pain could also help in strengthening your arms, and gently tugs on your upper back muscles as well as spine.
It is a breath-synchronized pose and helps in improving stability, coordination and focus, in addition to that persistent pain in your back. This pose also lends flexibility, making your body open up and prepare for more activity. It can help you stay active throughout the day as well, depending on how long you spent doing it.
How To Do It
- Kneel on the floor or on your yoga mat, and then proceed to put your hands flat on the floor or mat in front of you.
- Your hands need to be kept shoulder-width apart with your knees positioned directly below your hips.
- Take a deep breath, and at the same time, curve your lower back while bringing your head up.
- Tilt your pelvis similar to a cow’s – just as the name of the asana suggests.
- Now, deeply exhale and bring your abdomen in, all while arching your spine and getting your head + pelvis down, similar to a cat – again, as the name suggests.
- Repeat several times for a few minutes to reap maximum benefits from this pose.
Cow-Face Pose
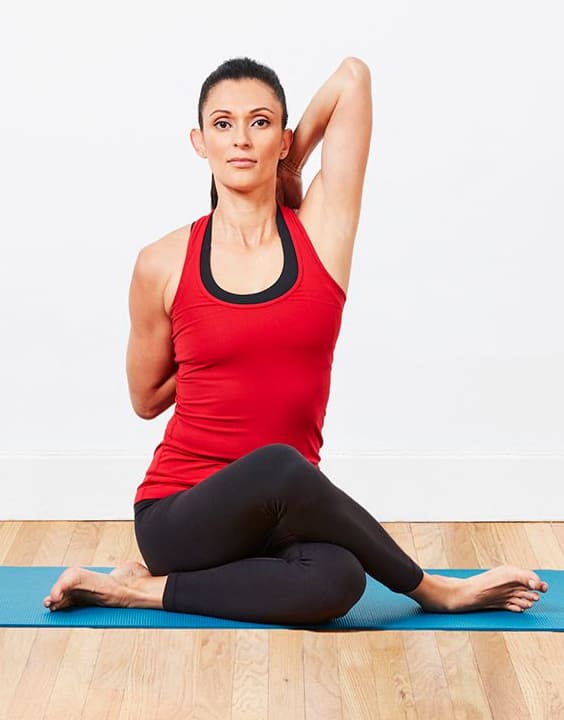
Also known as Gomukhasana, the cow-face is a great yoga for back pain pose. The minute you get into position, you will notice how the tension in your back muscles slowly starts to ease up. It can be performed by itself or with other seated poses, and the main thing that you have to do is sit upright while also finding a comfortable spot.
Giving good posture a boost, the cow-face pose can also contribute positively to your overall mood, as it requires staying in one place & position for more than a few seconds.
How To Do It
- Slide your knees across your centerline, then stack the right knee right over the left. It may help you to come forward onto your hands & knees to perform this pose.
- The right knee needs to be exactly in front of the left one.
- Separate your two feet and come back to sit in between them.
- Get your left arm up straight towards the ceiling.
- Bending the left elbow, bring the left hand to the back of your neck. Feel free to use your right hand to shift the left elbow gently toward your midline.
- Now, it’s time to lift the right arm out to the right side, bending the elbow, and bringing the right arm up to the center of the back.
- You need to clasp your hands behind your back.
- Bring both elbows at the center, keeping your head from tilting forward by putting pressure on the back of your head into your left arm. Keep breathing evenly.
- Unclasp your arms on an inhale.
- Do the pose with the left leg and right arm.
Yogi Panda Phone Cover is a unique and fun way to express your unique personality. The specially designed case for your phone will shelter your phone from bumps, falls, and scratches.
Yoga For Lower Back Pain: Sphinx Pose
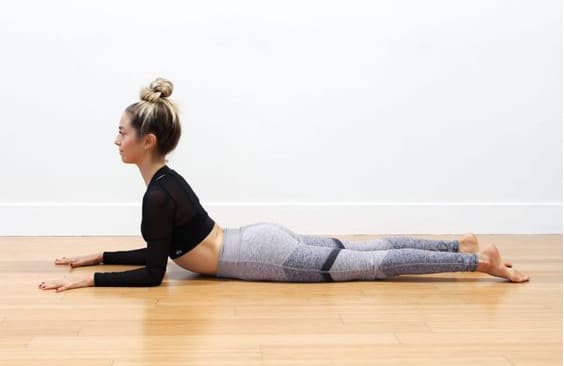
Also known as Salamba Bhujangasana, this yoga for back pain is a beginner level pose! It is something to start with and is often also a part of the warm-up process. By opening up your chest and shoulders, it gently stretches the spine, therefore ensuring fluid movement. The asana is also known for toning your body, as it works up numerous muscles.
Since your chest gets stretched in the process of doing this pose, it gets more room to breathe and you end up taking in more oxygen than usual. In addition to improving blood flow, it also stimulates healing.
How To Do It
- Begin by lying on your stomach with your toes flat on the floor, and your forehead firmly resting on the ground.
- Let your legs be close together, and your feet and heels touch each other lightly.
- Now, slowly stretch your hands in front of you with your palms facing downwards and your arms touching the ground.
- Take a deep breath in and lift your head slowly, also your chest and abdomen while ensuring your navel is still touching the floor.
- With the support of your arms, pull your torso back and off the floor.
- Continue breathing consciously, and curve your spine slowly.
- Make sure your feet are close together and your head is facing straight ahead.
- While breathing out, slowly bring down your abdomen, your chest and your head back to the floor.
Legs Up The Wall Pose
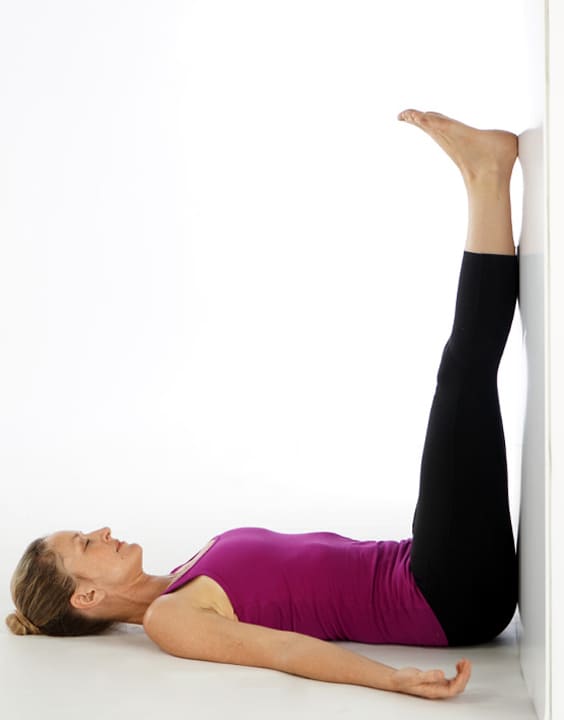
Also known as Viparita Karani, the legs-up-the-wall yoga for back pain promotes flexibility. It falls under inversion poses in Yoga, and if you were wondering What is the simple exercise for back pain? – then this is it! When you prop your legs up the wall and your pelvis is elevated on a blanket that’s folded, lymph and several other fluids that happen to lead to swollen ankles, knees, or congested pelvic organs start flowing into the lower belly; refreshing the legs and also the reproductive area. Viparita Karani also boosts blood circulation towards the upper body and head, creating a refreshing rebalancing after you have been standing or sitting in one place for an extended period.
How To Do It
- Start by sitting on the floor and facing a wall.
- Lower your shoulders and your head to the floor, while lying on your side.
- Now, rolling onto your back and stretching your legs, put them up by the wall. Your feet need to be hip-distance apart ideally.
- Go ahead and adjust your position by scooting forward your tailbone toward the wall.
- Search and settle on a comfortable position for your arms resting at your side, palms-up.
- Relax your arms and shoulders both, and also your legs by the wall.
- To come back to normal from this back strengthening yoga pose, begin by bending your knees and rolling to your side. Stay here and take a few breaths, before using your arms to slowly push yourself back up and be seated.
Extended Puppy Pose
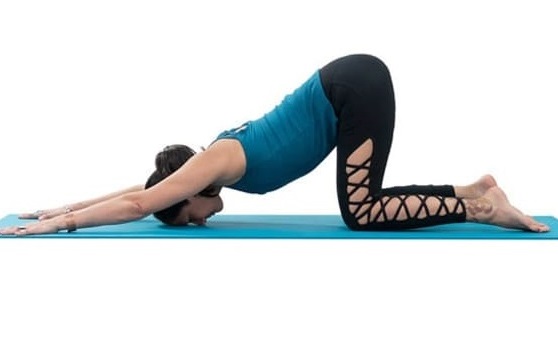
Also known as Uttana Shishosana, this yoga for back pain is a combination of Downward Dog and Child’s pose. By lengthening the spine, it helps in calming your mind too, at the same time alleviating back pain. It’s fairly easy to hold too, hence it is taught to beginners when they sign up for yoga lessons. Its main focus is the back, shoulders and arms, boosting strength and relaxation as well. The extended puppy asana will also aid you if you’re experiencing abdominal bloating or other gut-related issues, including belly fat that you think has been persistent.
How To Do It
- From a child’s pose or a tabletop, get your knees together.
- Put your fingertips ahead and bring your chest on the mat.
- Let your hips lift high up toward the ceiling, therefore opening up your chest and bending your back.
- Hold this position for a few seconds & then move on to another pose.
Thread The Needle Pose
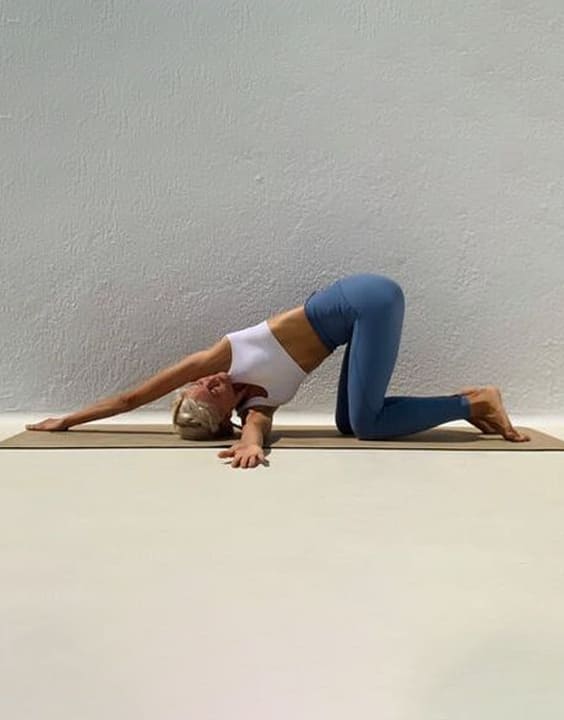
Also known as Parsva Balasana, Thread The Needle Pose can be performed as part of the warm-up for the neck and shoulders, either just as yoga for back pain, or to prep for challenging and advanced poses. Practicing this asana helps in relieving stiffness, tightness, and also tension in & around the shoulders, neck and back since you’re in a twist. Our everyday habits can lead to heaviness and tightness around the neck + shoulders, thus leading to constant back pain. This simple twist can help take care of it.
How To Do It
- Start in a neutral tabletop position. Your hands and knees should be placed on your mat.
- Breathe out and reach your right arm which is under your left arm.
- Now, lower your right side shoulder and ear to the ground.
- Maintain equal weight in both your knees and feet straight out behind you.
- Hold this for 5 to 10 breaths.
By making sure you do these poses that are centered around yoga for back pain, you can help yourself tremendously!
Also Check: 15 Best Yoga Dress For Women


