Late in 2019 and all of 2020, if there was one thing that was all over everyone’s Instagram feeds, it’s tie-dyed everything! From co-ords to jumpsuits, t-shirts to dresses and all else in between, it seemed like no one could get enough of this color-splashed and vibrant art form.
Thanks to the 2019 runways, tie-dye saw a resurgence, and this time it was purely fashion. Ace designers didn’t shy away from experimenting with other prints combined with tie and dye techniques, and the fashion people of the world took notice, resulting in everyone going gaga over it!
If you’re looking for a little DIY project that will save your old clothing, while also breathing new life into it, then there’s nothing better than tying and dyeing them! Before we get to the ‘how to’ part though, we think it’ll be fun to look at and read all about how this art form came into being, what made it so popular, and how it evolved around the world!
A vivid history of Tie & Dye.
Also known as ‘Bandhani’ in India, tie and dye is one of the oldest art forms to exist, with references dating back to the prehistoric era. Yes, it is now all over the runways and our Instagram feeds, but the traditional tie and dye techniques have been around for centuries, evolving into several forms now.
Often related to the hippie culture and known to denote self expression, tie & dye might be a favorite among the free-spirited wanderers but it holds a lot more cultural significance than that. From being in the spotlight in the 1960s to being in the spotlight even today, tie & dye has sure come a really long way.
Bandhani, as we mentioned earlier, is actually coined from the Sanskrit term ‘Bandh’ which means to tie. The art form has been practised in India for a really long time now and was originally done by using fingernails to pluck small bindings of the cloth, therefore forming tie dye patterns.
Earlier, it was only done with natural dyes but now, since the demand for it has increased and since we’re in the new-age, synthetic dyes are often used too. The artform also holds religious significance in India and is considered to be very auspicious for brides and brides-to-be.
Now, let’s take a look at its evolution and origins outside of India. You might have heard of shibori, one of the well-known tie and dye techniques that happens to have originated in Eastern Japan.
Tie and dye is also known as fabric manipulation, and shibori tie dye shirts make use of resist dyeing techniques to form patterns on the fabric or textile. Indigo dyes are very common for this technique, and that is usually how one can distinguish between shibori and other types of tie and dye methods.
In 1960s America, tie and dye was right at the top of the fashion charts, thanks to the hippie culture and psychedelic music.
It was on almost everyone’s mind and their closets. Another reason for its success was the DIY kits introduced, which made it very simple to just tie-dye your sweatshirts or basically anything right in your backyard. This didn’t just see one color, but an array of bright and bold colors, along with vivid patterns.
That is exactly what led to the endless fame of this art form, and became sort of a symbol for love and peace due to the bright palettes.
Things you’ll need for tie and dye designs.
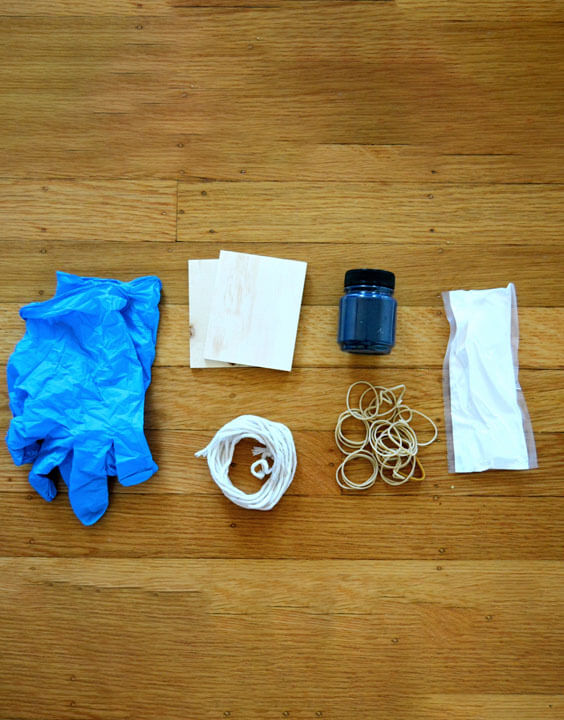
The charm about tie and dye techniques remains in the fact that although it is done in factories and by skilled craftsmen, a lot of basic types of the artform can be done right from the comfort of your home.
If you have younger cousins coming to visit over the holidays, this might just be the perfect activity to indulge them in! Besides, it will give you a brand new outfit and earn some praises from your peers. Here’s a non-exhaustive list of all the things you require!
- A couple of pairs of disposable rubber or polythene gloves.
- Rubber bands. Lots and lots of rubber bands. (Alternatively, you can also use thick threads.)
- Preferred cotton fabric, hoodies or t-shirt. Canvas shoes will work too.
- Plastic surface cover or sheet.
- Squeeze bottles.
- Dyes.
- Dye powder.
- A bucket or tub.
Basics of Tie-Dyeing.
- First and foremost, make sure the fabric or surface you choose is made from natural fibers like cotton. The minute you pick a synthetic surface, you know your time is wasted and your little project is doomed because they refuse to absorb water – or dye.
- Second, wash the fabric before you begin the tie and dye techniques! Make sure it’s damp enough to allow the dyes to absorb nicely, and do so without adding fabric softeners or any other agents to your washing machine or your bucket.
- Next, don’t forget to lay out a plastic surface cover on your floor or table, wherever you choose to DIY. The dyes are very different from paints, and will not just stain but coat the surface completely, leaving your furniture or carpet ruined forever!
How to Tie Dye perfectly!
The gift of tie dye to us peasants is its ability to be manipulated in any way we’d like! From specific patterns to abstract designs, there’s nothing you can’t do with the art form. Here are our favorite ways of tying and dyeing, and they’ll become yours too! Read on and take notes, and get your friends to make it all the more fun.
1) The Shibori Technique

Like we mentioned before, shibori originated in Japan and is placed on the global map in terms of tie-dye. It is much more intricate and symmetrical than other tie and dye techniques which we will explore soon enough. For now, let’s see how to do shibori tying and dyeing the right way!
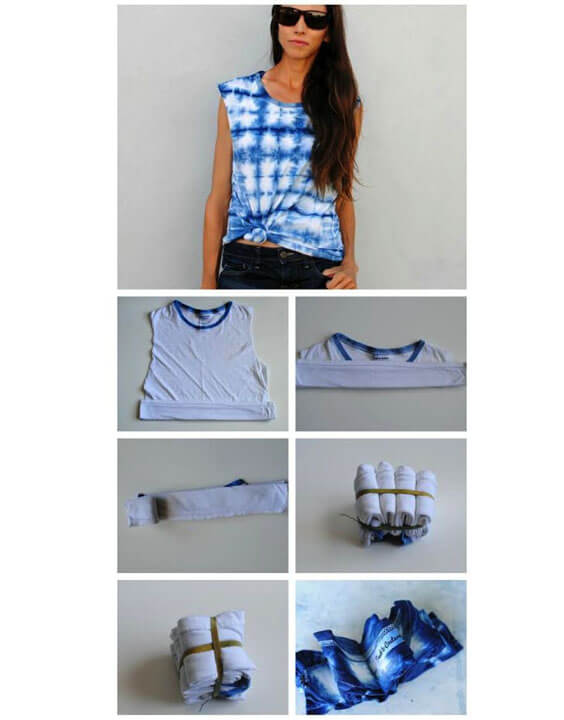
Step 1: Layout your t shirt or fabric on a plastic surface sheet neatly. Make sure there are no wrinkles.
Step 2: Starting from the bottom, make accordion folds on your way up. Once done, do the same in the other direction too, i.e. left to right or right to left.
Step 3: Take a couple of rubber bands and tightly wrap them around both directions of the fold. Make sure the band doesn’t break.
Step 4: Now, it’s time to dye! Put on your gloves, mix some dark blue and indigo dye in a squeeze bottle, since indigo is the primary color used for this technique. Now, start pouring the dye on the exposed bits of your chosen fabric.
Step 5: Once done, put the bunched up fabric into a plastic bag. Seal tightly. Leave it to rest for a little over 7 hours and nothing less than that.
Step 6: After the allotted time ends, take it out and open it up! Put it on a hanger and leave it to dry. You have now aced the shibori tie and dye t-shirt!
2) Ombre Technique

The hair trend that has been on everyone’s mane for several months now is not just limited to the head; ombre clothing too is having a moment!
As easy it is to pick an ombre outfit from Brown Mocha, it’s one of the tie and dye techniques that is super fun to do yourself at home. Wondering how? Just follow our easy steps and you’ll be set! You just need two large, thick paintbrushes for this one, in addition to the earlier essentials we mentioned.
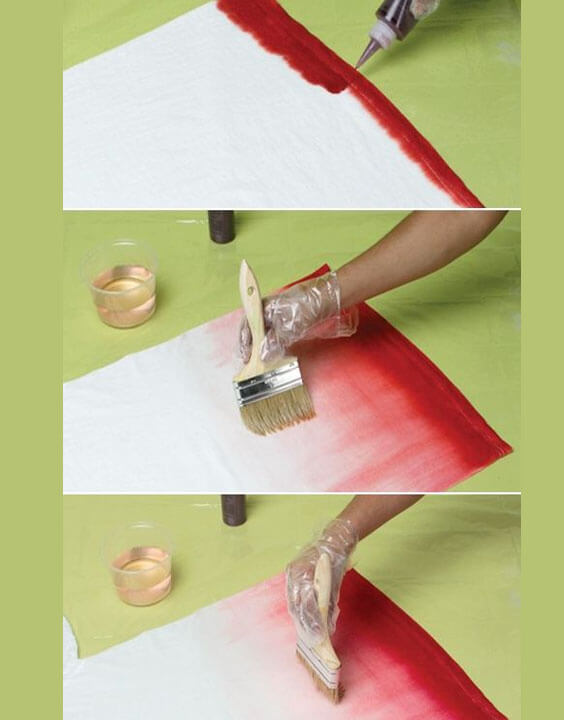
Step 1: Lay out your sweatshirt or fabrics on a flat surface. Don’t forget the plastic sheet. Slip into a pair of gloves right about now!
Step 2: With the color of your choice, start painting the edge of the fabric. Now, with another wet, colorless paintbrush, start dragging the dye upwards on the fabric. This will create a pleasant gradation of your chosen color.
Step 3: You can stop in the middle if you like, or go all the way with the same color. If you do choose another hue though, start from the other end and follow steps 1 & 2. Make sure to perfectly merge and blend them both though. And you now have a tie dye sweatshirt!
3) Crumple Technique
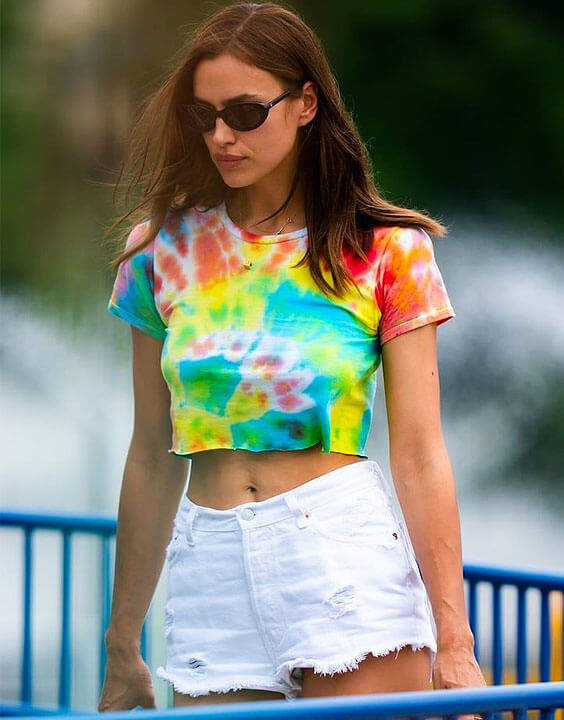
This is one of the tie and dye techniques that are just as easy as the ombre, and won’t take much time at all! The crumple tie dye technique doesn’t just look good on clothing but also works amazingly on pillow covers, table cloths, bedsheets, etc. If you were looking to give your home a colorful upgrade, this is it!
Step 1: Just like all other techniques, this one too requires you to lay your fabric flat on your workspace.
Step 2: Now, crumple up the fabric or item. There are 2 ways to do this; you can choose to crumple it tightly to get a more defined design, or loosely for a free-flowing pattern.
Step 3: Once you’re satisfied with your crumple, take a few rubber bands and secure them around the bundle. You can choose to skip this step though.
Step 4: We like using multiple colors for this technique! Fill your squeeze bottles with various dyes and take chances of pouring them onto the exposed bits. Alternatively, you can also mix colors for a unique palette!
Step 5: Just place this in a plastic bag or wrap it up in some plastic, leave it overnight and in the morning, you’ll have crumpled tie dye hoodies or tees, or a decor piece! Trust us, it’ll be just like the ones you see on your favorite online shopping app!
4) Folding Technique
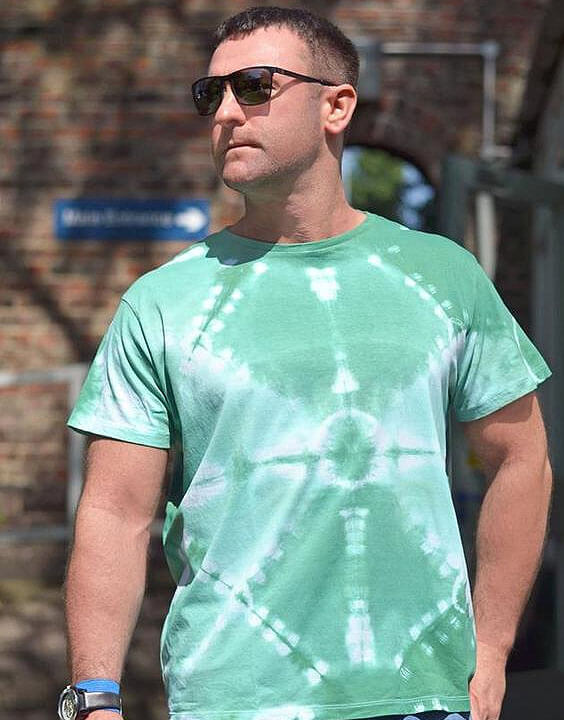
If you liked the shibori tie and dye techniques, we’re sure you’ll have a lot of fun with the folding technique as well! It’s geometric, symmetrical and super fun to do – as you just have to create lots of folds and color them up!
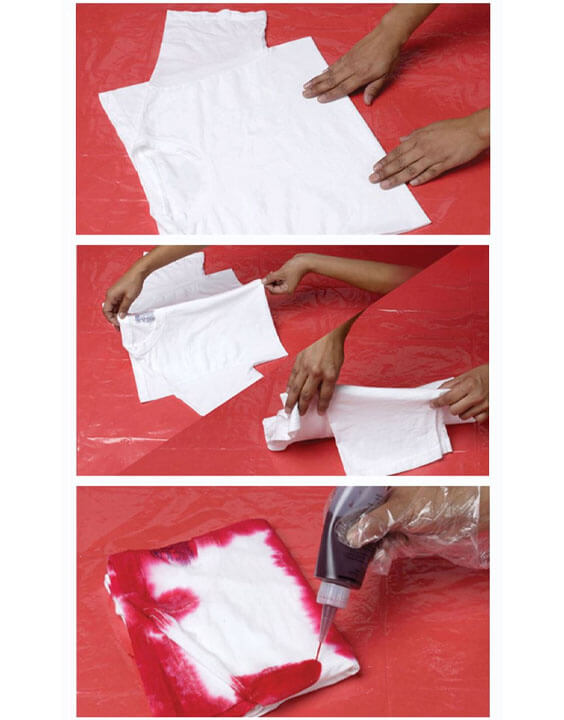
Step 1: Start by folding your fabric in half.
Step 2: Fold it halves 2 more times.
Step 3: Now, put on your gloves and add dye to a bottle. Carefully color the edges of the folded bits, front and back both.
Step 4: Put it in a sealable plastic bag for around 7-8 hours. Then, take it out, open it up and leave it out to dry!
5) Spiral Technique
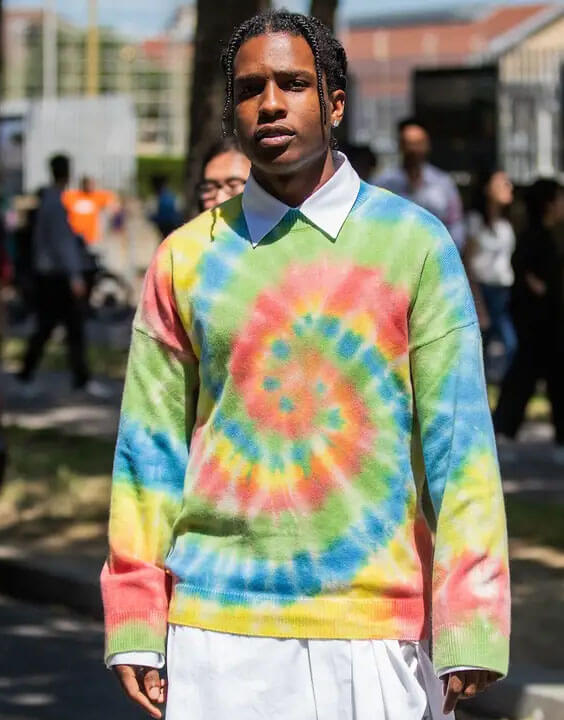
We don’t just like a dramatic twist in our favorite books or movies, but also in our wardrobe!Enter a brand like Brown Mocha only on Bewakoof for spiral tie-dye, the perfect technique to spruce up an otherwise boring t-shirt. This one is the easiest one on our list, even though it looks super complicated. Wondering how you can achieve it? Follow these steps to the T!
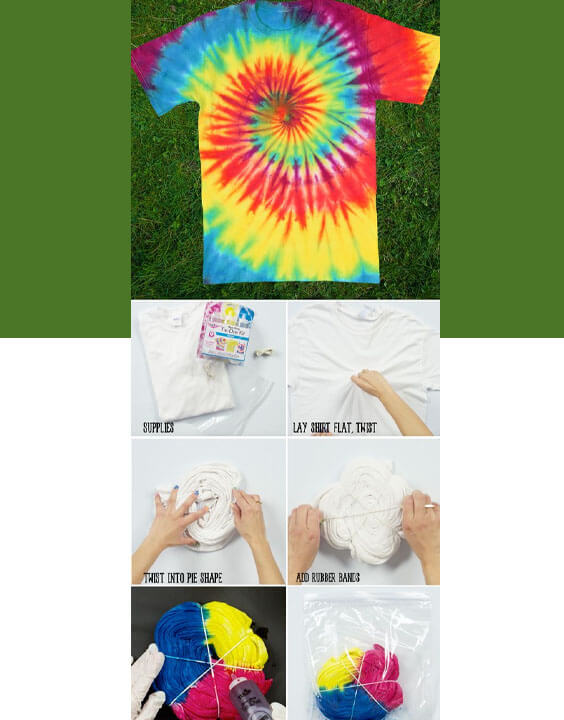
Step 1: Once you’ve laid out your fabric flat on the surface, find the centre of it and work your way from there.
Step 2: Pinch the centre and with your fingers and hands, start twisting it clockwise. Do this till the entire fabric is twisted and tight.
Step 3: To secure them, use rubber bands and put them around all possible sides. You should have at least 6 rubber bands, criss crossed over each other and also, equidistant.
Step 4: Add various colors to the exposed fabric, at the front as well as the back. The more colors, the better!
Step 5: Now, set it aside after wrapping it up in plastic. Open after 7-8 hours and leave it to dry!
We hope you have tons of fun with your tie-dye project – because we sure did.
Bewakoof is India’s most popular online shopping site for the latest fashion trends. We bring you a wide range of tie-dye shirts, t-shirts, hoodies, and sweatshirts.
With our tie-dye shirts, t-shirts, hoodies, and sweatshirts you can be assured of the latest fashion trends and quality products. Our tie-dye shirts are available in different colors like blue, pink, and many more. Get your favorite design now!
